Integrate the Real-time JavaScript widget to validate email fields in forms quickly. You can add this widget to your forms by following simple steps.

Navigate to the left side menu bar and click the Widget.
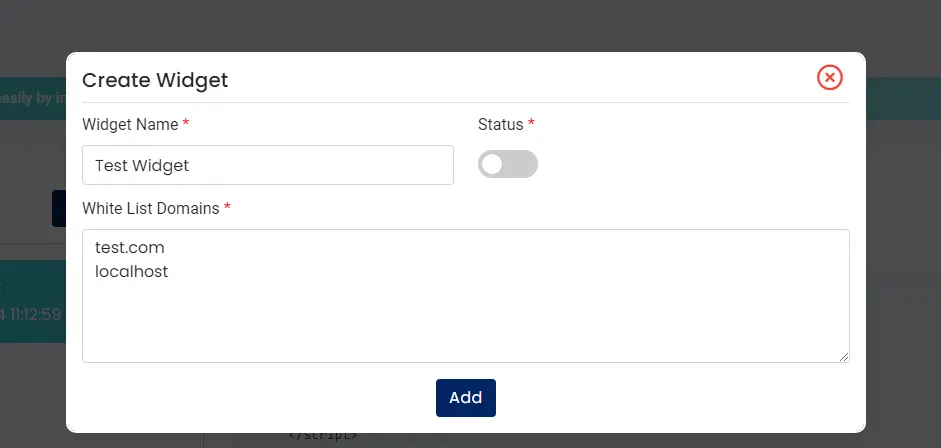
Hit the Create Widget Button, and then you will see the pop-up.

Fill in the Widget Name, Change the Widget Status to Active or Inactive, Enter the domains you wish to Whitelist one by one and then Hit the Create Button.
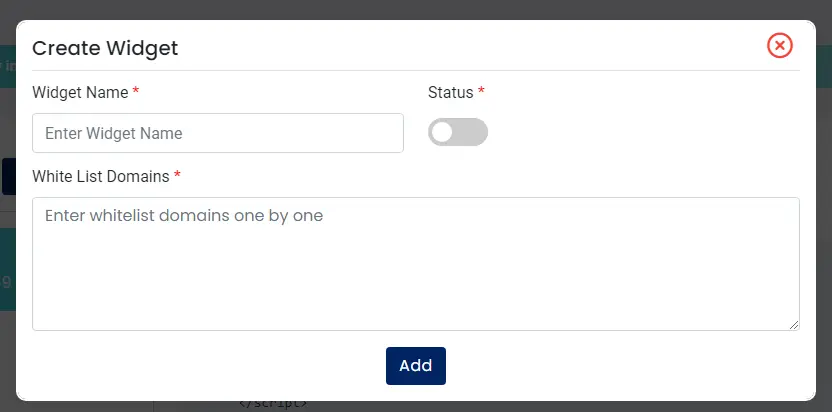
To successfully create the widget, change the widget status to active; fill out the widget name and whitelist domains. If the widget status is not active, but the widget name and whitelist domains are specified, the created widget will remain inactive.
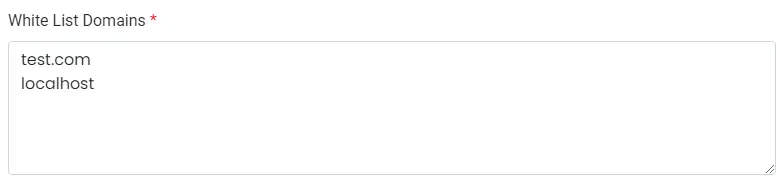
Whitelist domains enable additional HTTP headers to allow a web application running at one domain to access particular resources located at another without any restrictions.
You can use the * wildcard to include all subdomains.
Only proper domains, sub-domains and wildcard domains are allowed here:
Domains: Ex: xxxxxx.com, yyyyyy.xxxxxx.com, *.xxxxxx.com.
Not Allowed: Ex: https://xxxxxx.com/, xxxxxxcom.
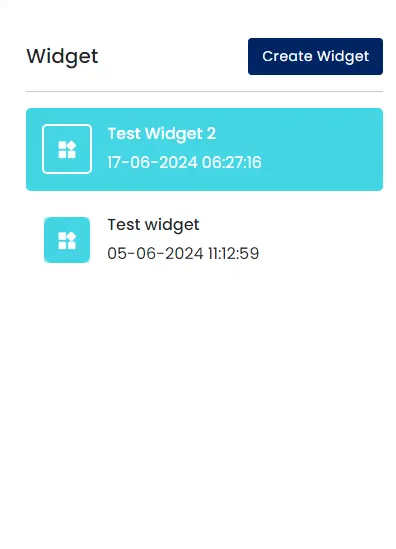
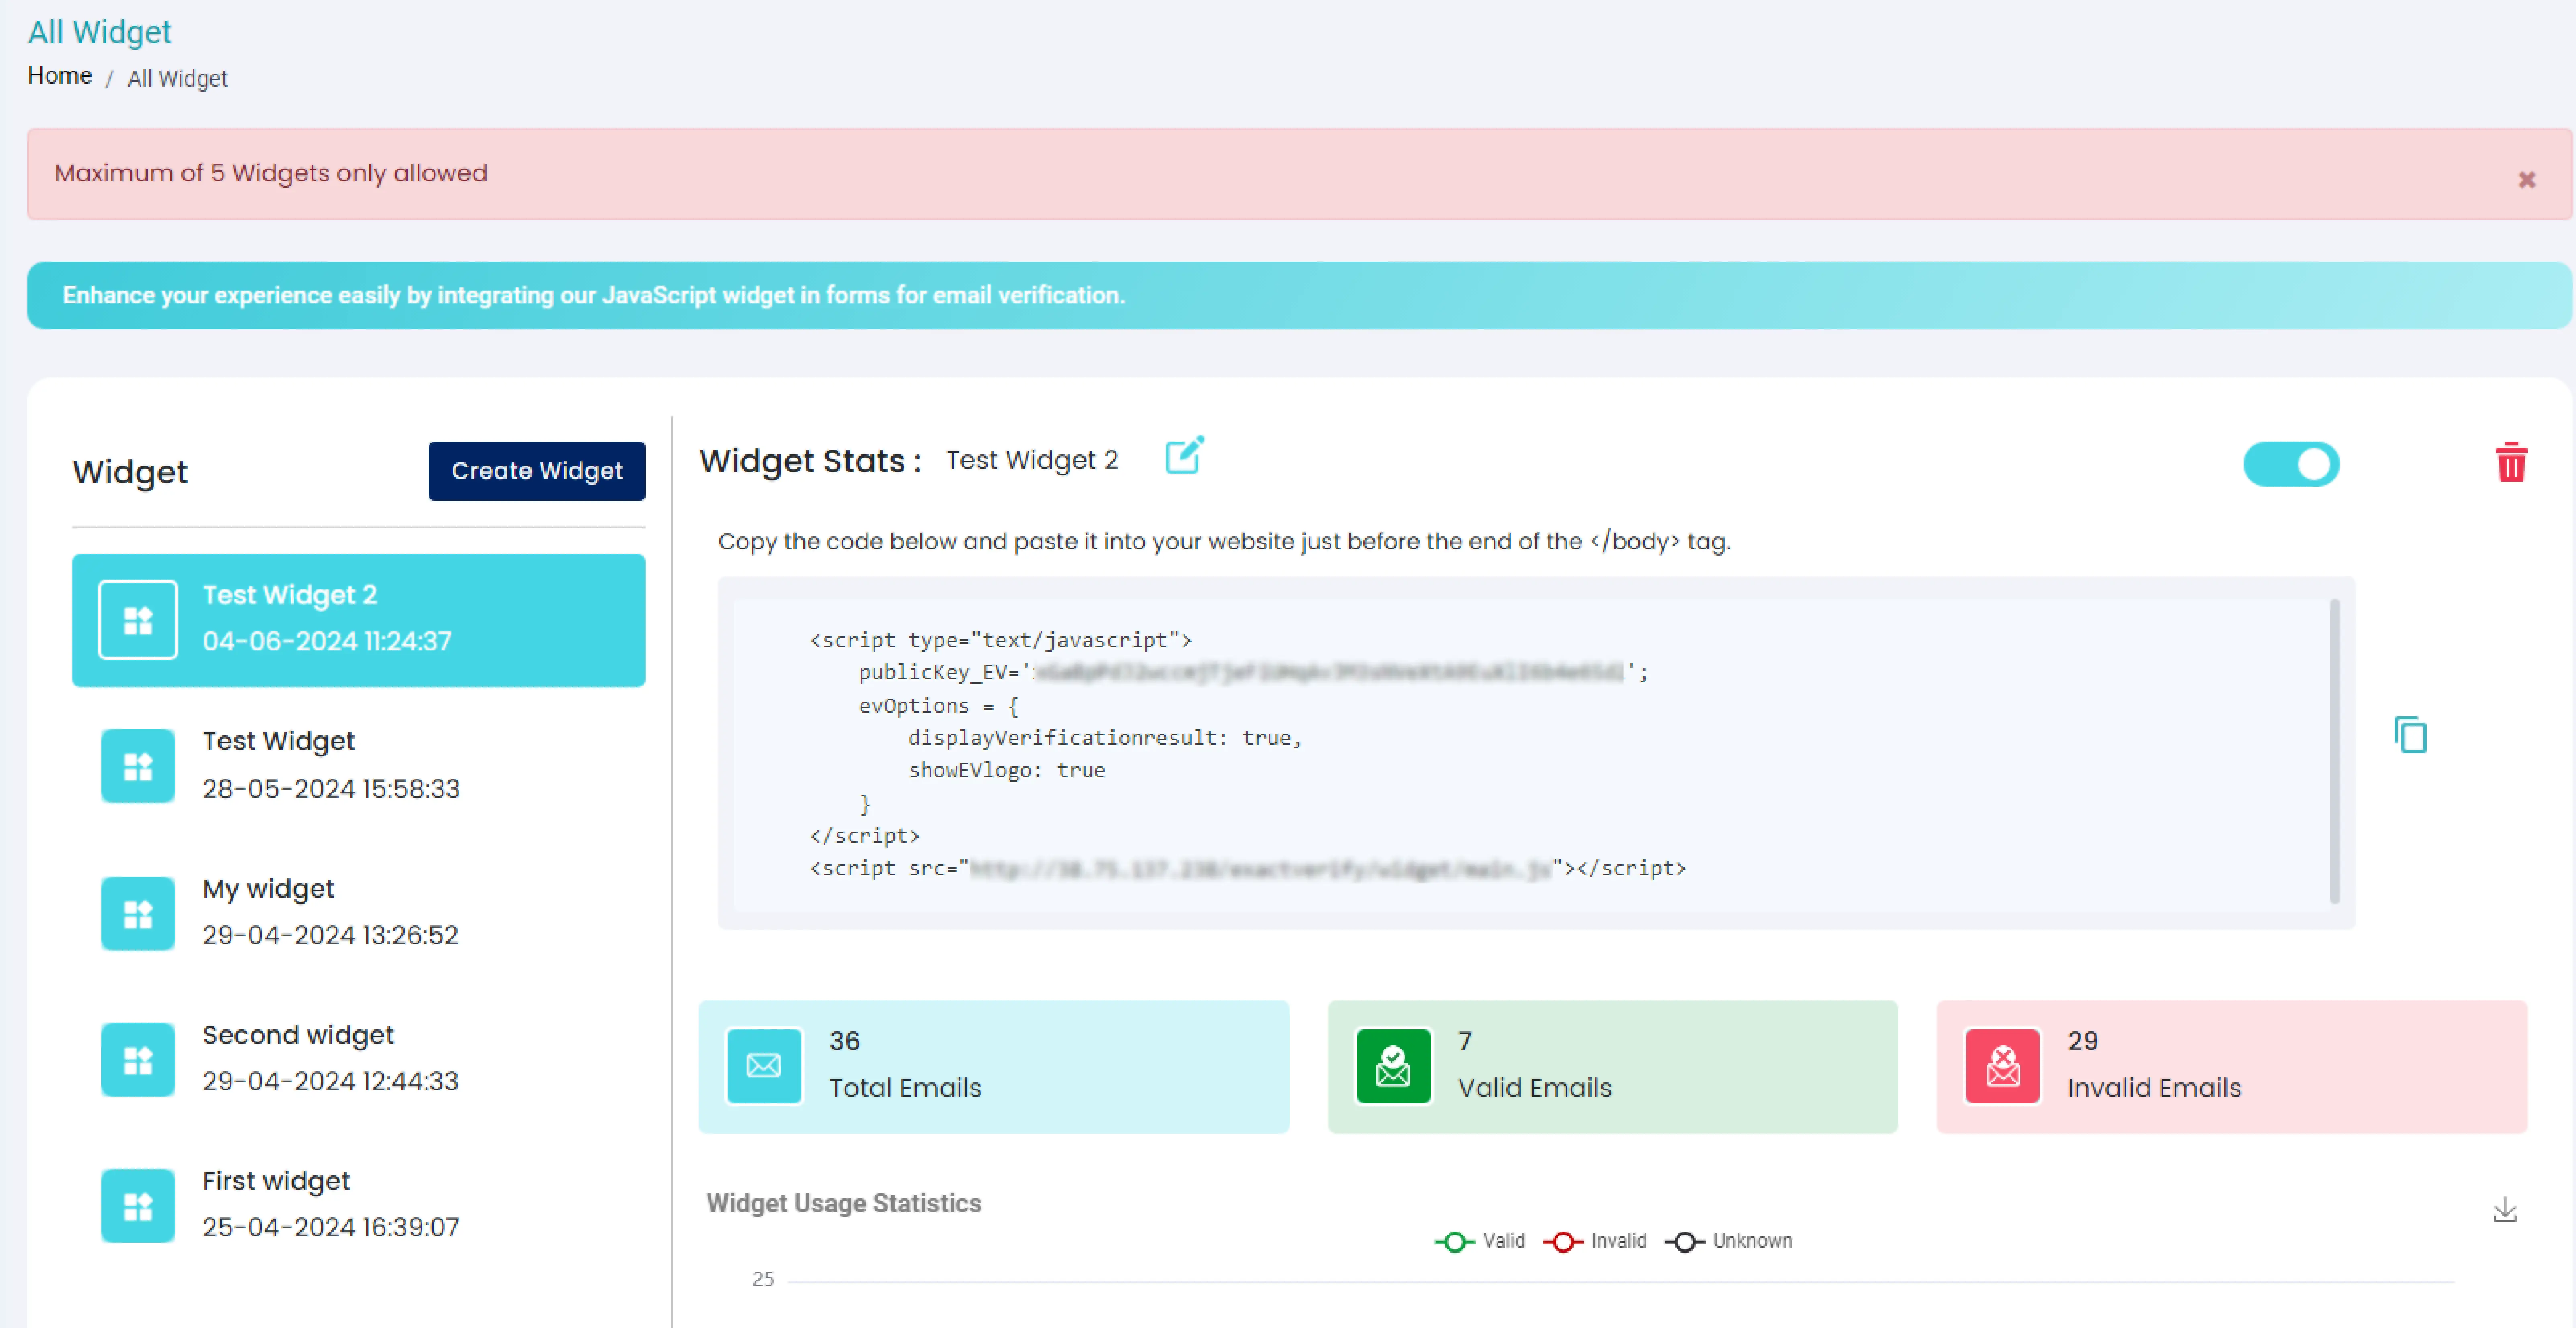
After successful widget creation, the left side panel will display the widget name.
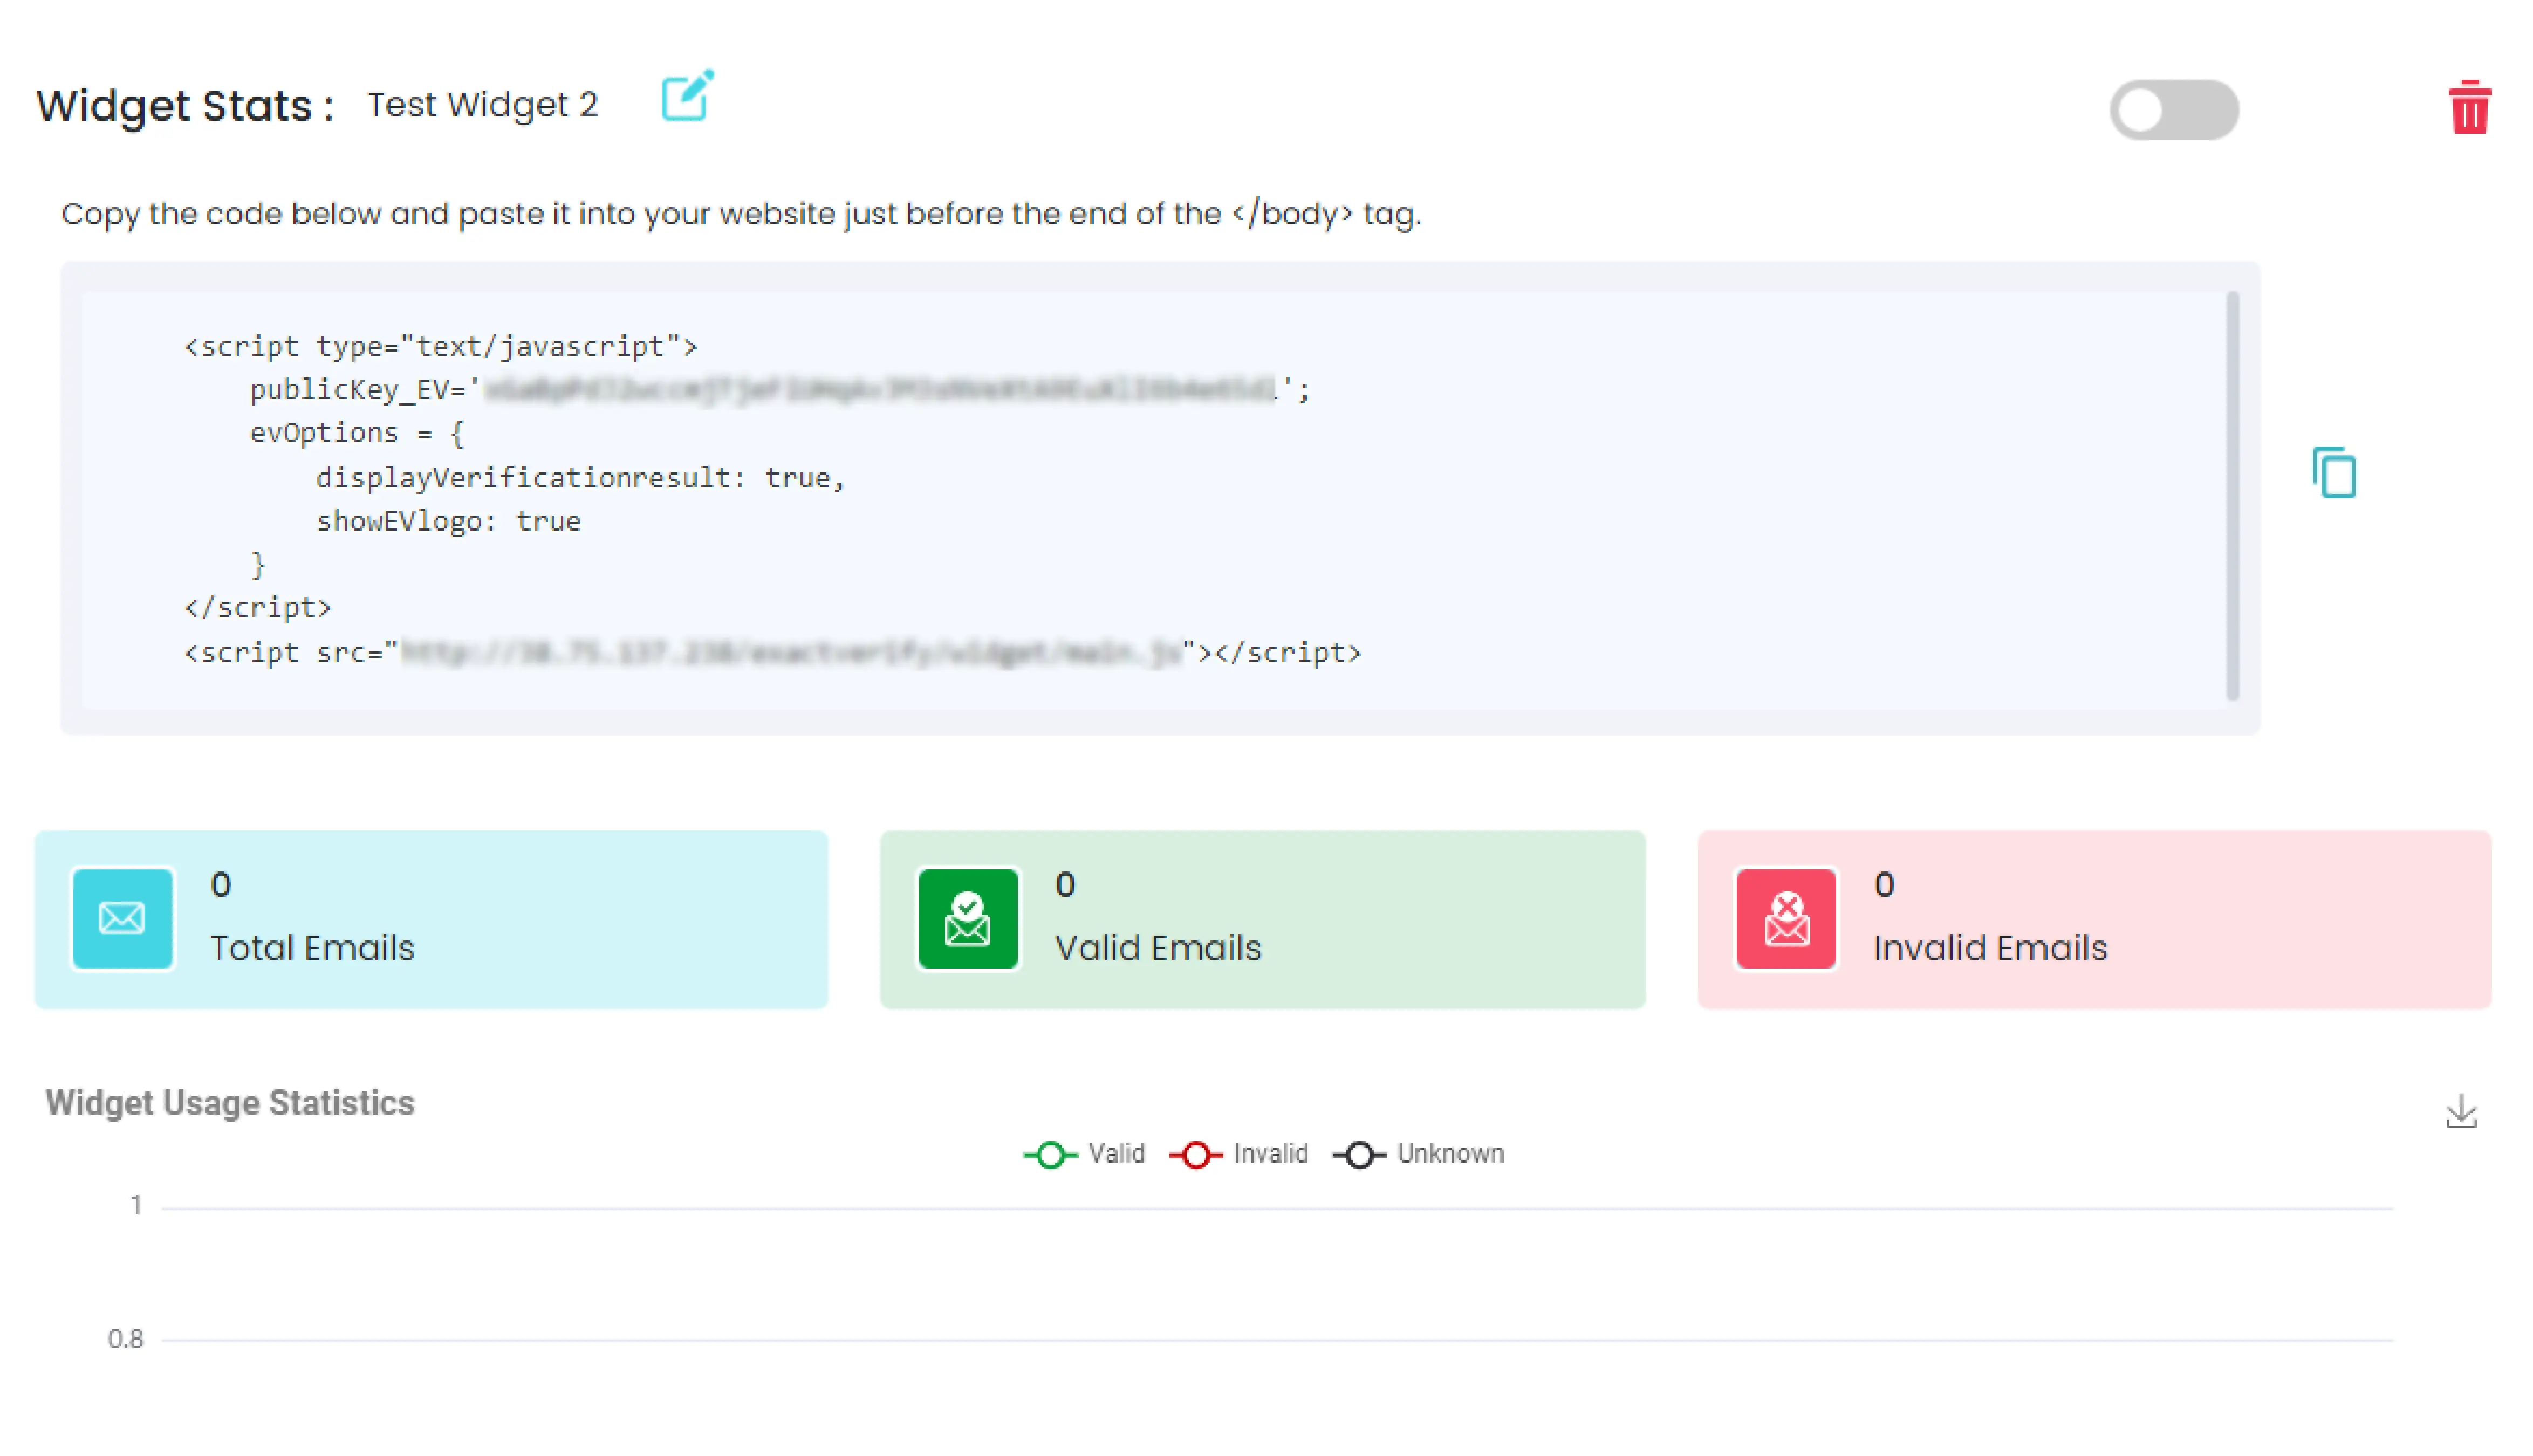
When you click the widget name you created, the Java script and statistics data will appear on the right-side panel.
If you would like to edit the widget details, click the Edit Icon provided at the top next to the widget name.
If you would like to change the widget status, simply click the toggle icon provided on the top right.
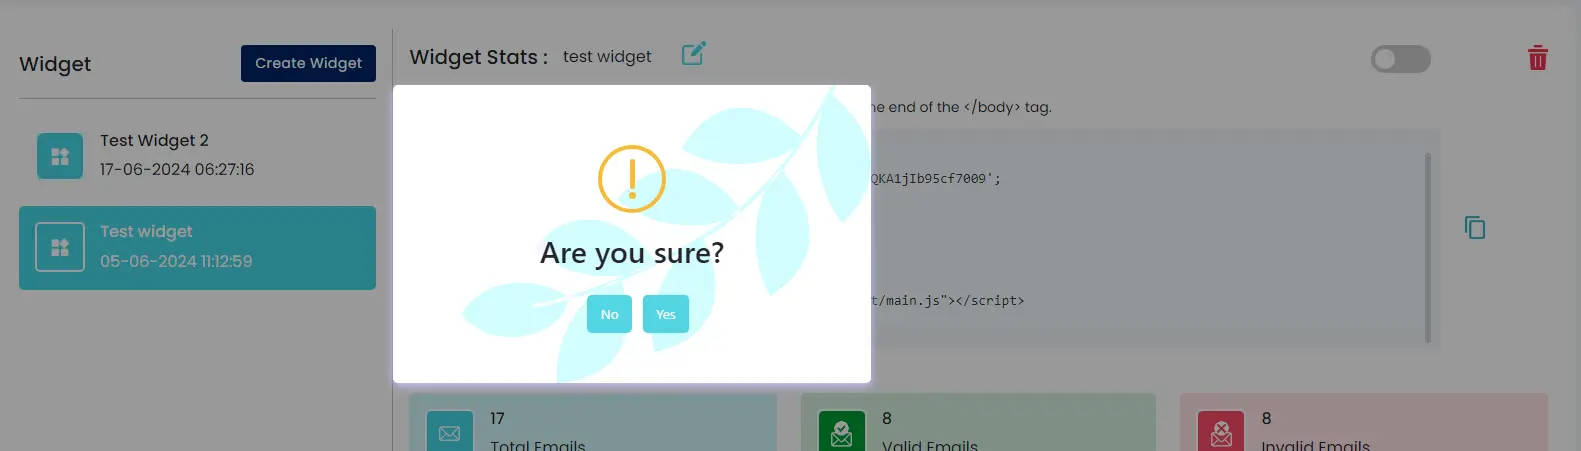
To delete the widget, follow these steps: Click the delete button provided on the top right and then confirm your choice by clicking “yes” in the pop-up menu.
You are limited to create only five widgets due to a limit imposed by the platform.
    <script type="text/javascript">
        publicKey_EV='YOUR_API_KEY';
        evOptions = {
            displayVerificationresult: true,
            showEVlogo: true
        }
    </script>
    <script src="https://www.exactverify.com/widget/widget.js"></script>
    <script type="text/javascript">
        publicKey_EV='YOUR_API_KEY';
        evOptions = {
            displayVerificationresult: true,
            showEVlogo: true
        }
    </script>
    <script src="https://www.exactverify.com/widget/widget.js"></script>
    <script type="text/javascript">
        publicKey_EV='YOUR_API_KEY';
        evOptions = {
            displayVerificationresult: false,
            showEVlogo: true
        }
    </script>
    <script src="https://www.exactverify.com/widget/widget.js"></script>
    <script type="text/javascript">
        publicKey_EV='YOUR_API_KEY';
        evOptions = {
            displayVerificationresult: true,
            showEVlogo: true
        }
    </script>
    <script src="https://www.exactverify.com/widget/widget.js"></script>
    <script type="text/javascript">
        publicKey_EV='YOUR_API_KEY';
        evOptions = {
            displayVerificationresult: true,
            showEVlogo: false
        }
    </script>
    <script src="https://www.exactverify.com/widget/widget.js"></script>
    <script type="text/javascript">
        publicKey_EV='YOUR_API_KEY';
        evOptions = {
            displayVerificationresult: true,
            showEVlogo: false
        }

        field = document.querySelector("input[id='email']");

        field.addEventListener('evbeforeVerify', function(e) {
            console.log(e.detail);
        });
        field.addEventListener('evafterVerify', function(e) {
            console.log(e.detail);
        });

    </script>
    <script src="https://www.exactverify.com/widget/widget.js"></script>